
Introduction
In conjunction with a public referendum I was given the task to create an intelligent chat bot. The chat bot could understand what the user wanted to know and provide the answers that our subject matter experts had prepared. This post describes how to program the bot to capture user intents and take action. The post assumes that you have already read the first post on this topic.
Choose an IDE
While I prefer to use a command line editor such as nano or vim when editing files over a slow internet connection, or Jupyter notebook when running experiments with python, sometimes a Integrated Development Environment, IDE, can really improve your productivity. Since we are going to program the bot in JavaScript, this is one of those situations. I am by no means a JavaScript expert so the built-in autocompletion and other aids are useful supports for me.
There are plenty of options out there so choose an IDE that is right for you. While I usually rely on Eclipse for Java and C++, I decided to give Visual Studio Code a try for this project, and it was a positive experience.
File structure
As was descriped in the previous post, we are creating the chat bot using the Microsoft Bot Framework. If you followed the instructions in the last post you should now have a git repository with a node.js implementation of the bot framework.
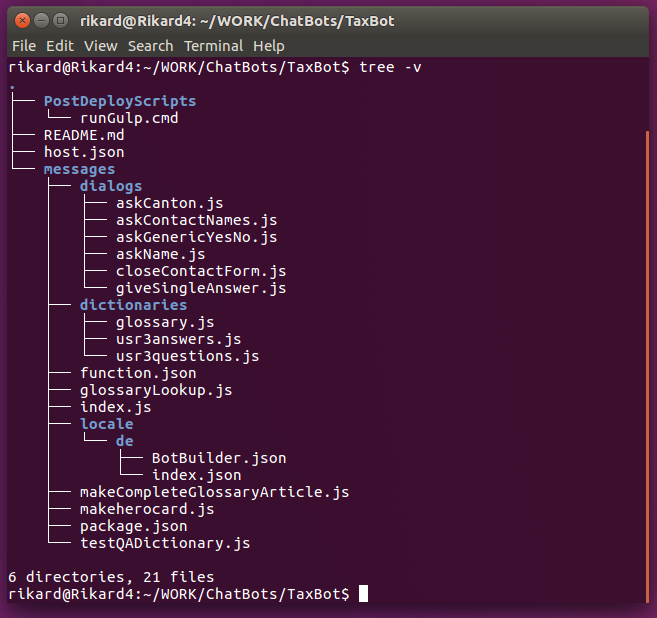
Since we created the code skeleton by exporting it from the Azure portal, the code in your git repository will already contain some files and folders. We will edit those and add more files to set up the bot dialogs.
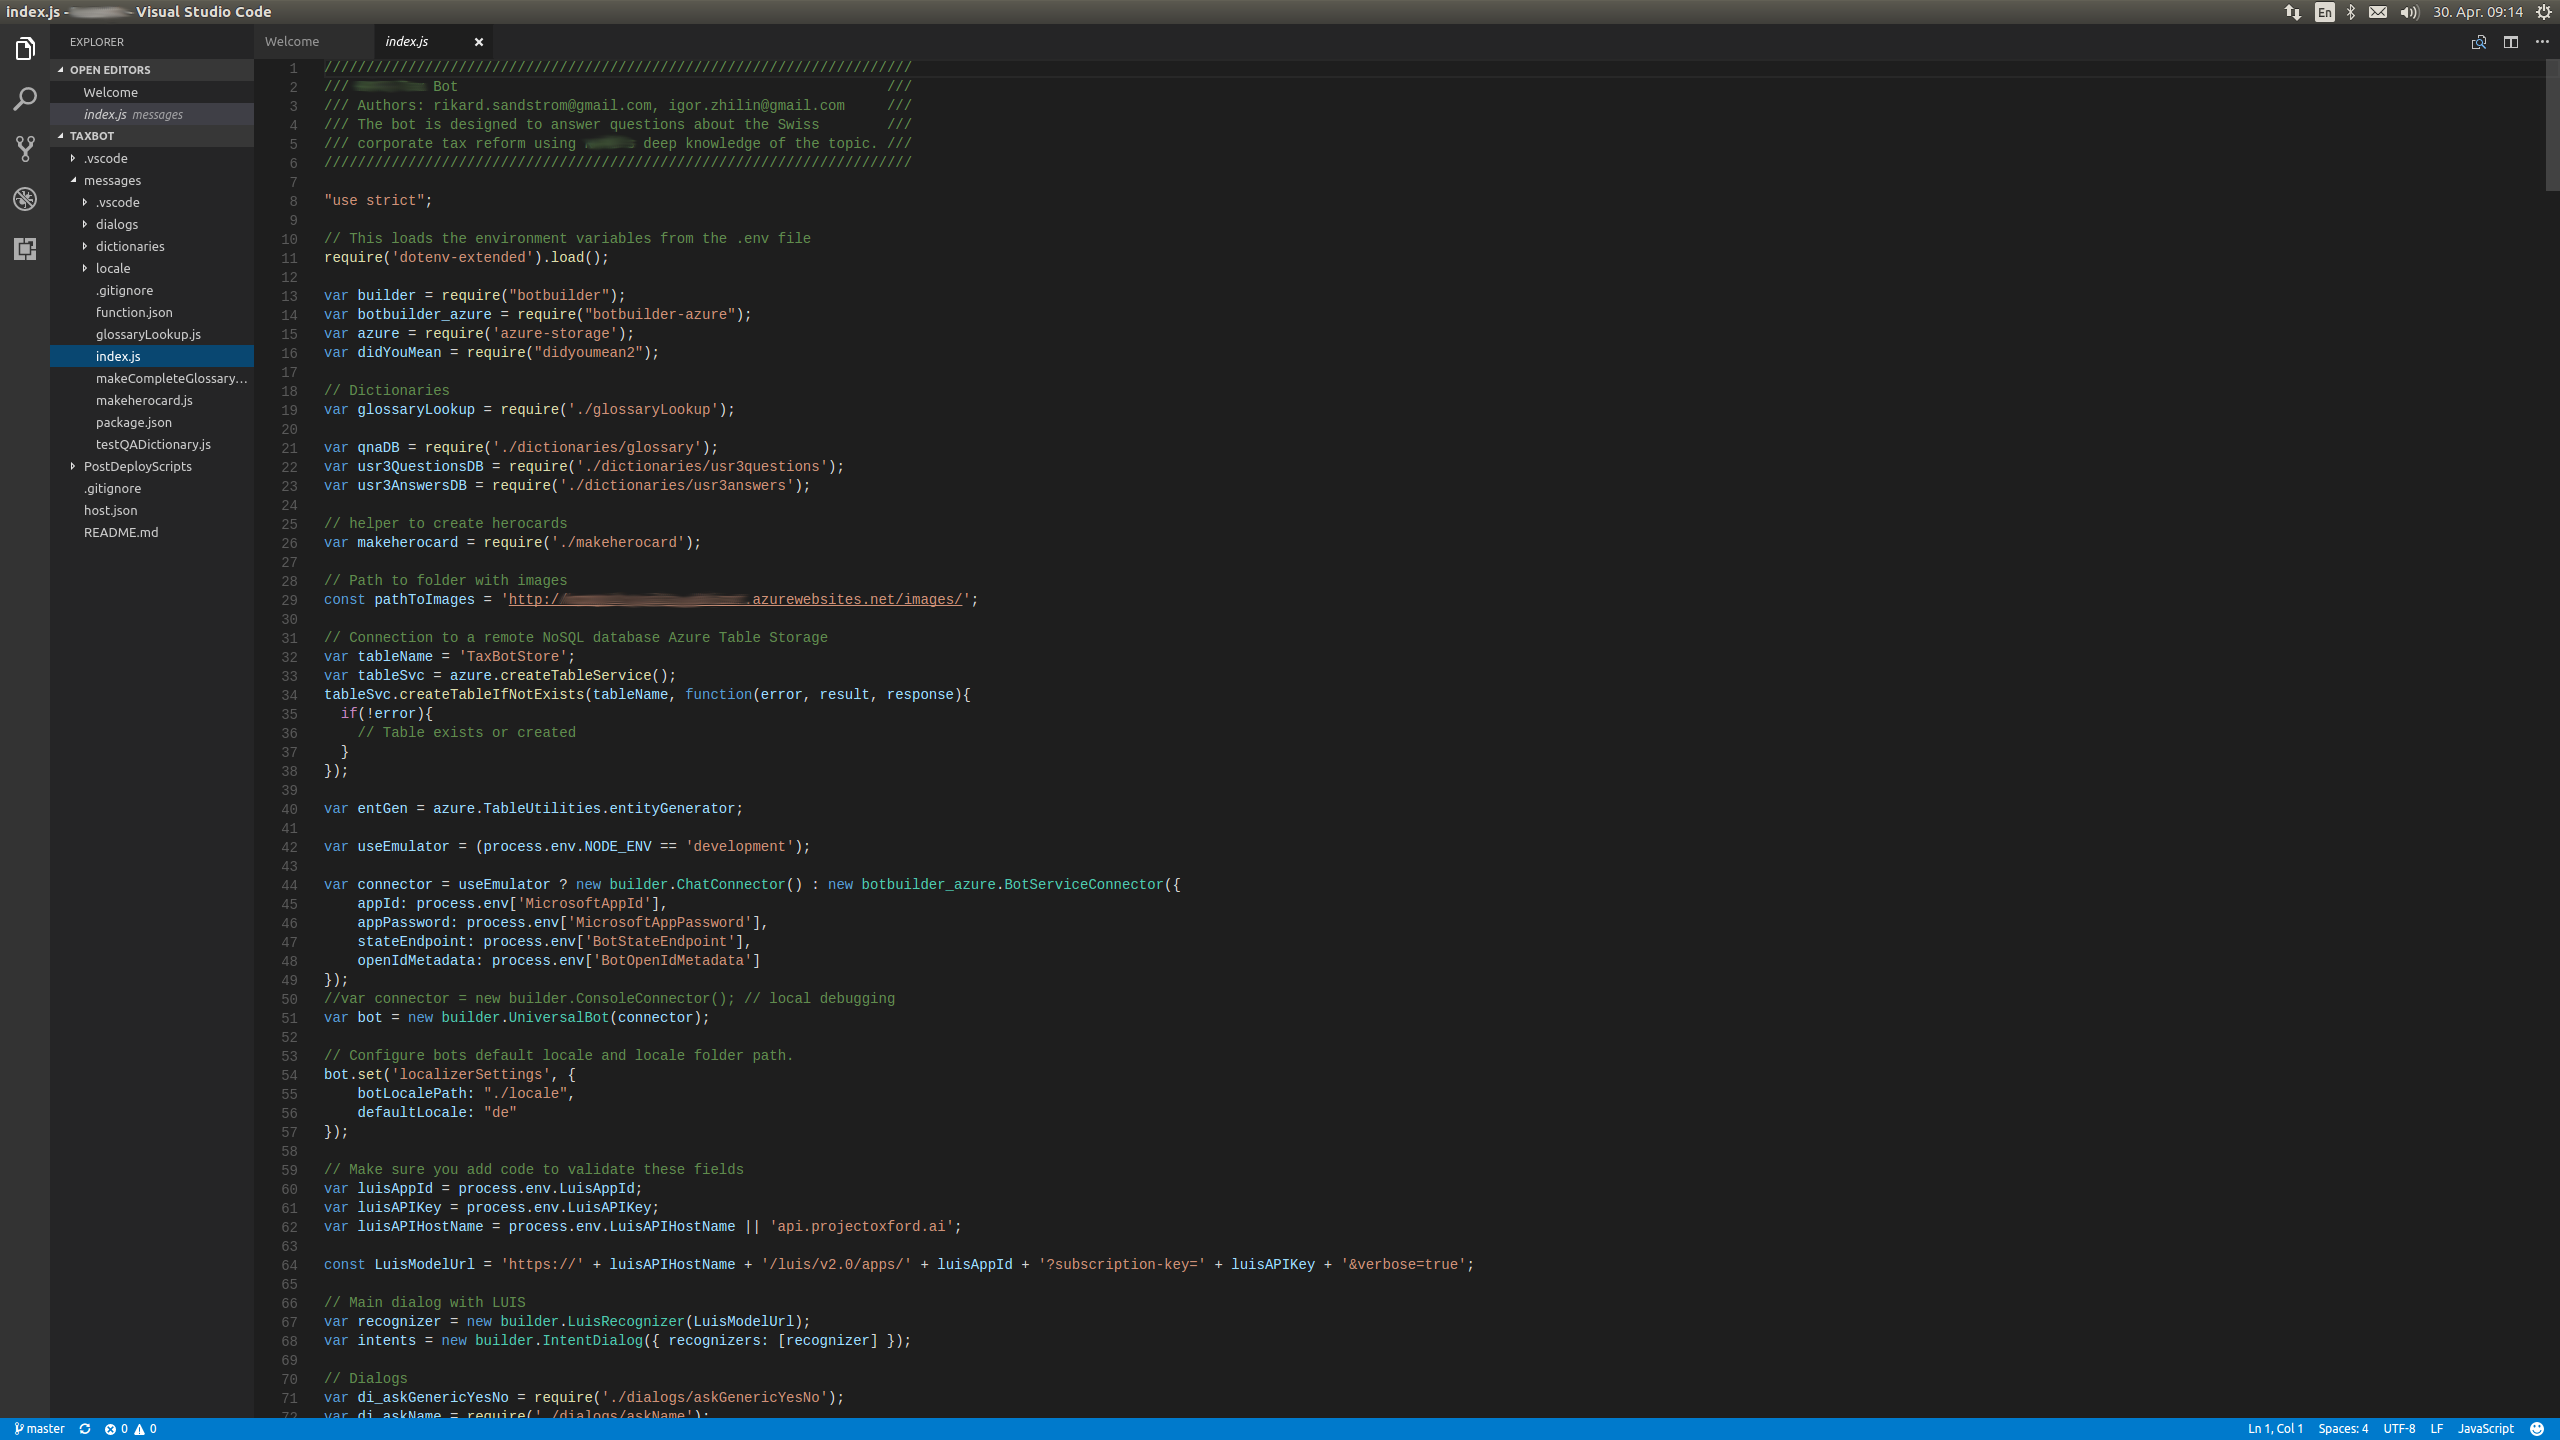
The files we will be working with are all located in the messages folder. The main file for the bot is index.js. This is where we set up connections to other services, such as the natural language processing service. It is also from here we steer the conversations into dialogs.
To keep things tidy, we create a subfolder for all the dialogs that the conversation can enter into, and call it dialogs.
For quick lookup of answers to questions, we will create a number of dictionaries, which we also store in its own subfolder called dictionaries.
Region specific settings, such as default messages in the user language, can also be written as dictionaries and stored in locale/CountryCode/, e.g., locale/de/ for German.
Connecting the bot to LUIS
We need to tell the bot which LUIS model it should use and provide the credentials to it. This can be accomplished through process.env which picks up the values that we added in the application settings of the bot service.
var luisAppId = process.env.LuisAppId;
var luisAPIKey = process.env.LuisAPIKey;
var luisAPIHostName = process.env.LuisAPIHostName || 'api.projectoxford.ai';
const LuisModelUrl = 'https://' + luisAPIHostName + '/luis/v2.0/apps/' + luisAppId + '?subscription-key=' + luisAPIKey + '&verbose=true';
var recognizer = new builder.LuisRecognizer(LuisModelUrl);
var intents = new builder.IntentDialog({ recognizers: [recognizer] });
bot.dialog('/', intents);
To do local development and testing it can be useful to add these variables to a local file as well. If you call this file .env the line below will pick up these environment variables.
// This loads the environment variables from the .env file
require('dotenv-extended').load();
Remember to add .env to your .gitignore file, otherwise you will expose your access credentials to the github community!
Dialogs
Dialogs are parts of the conversation between the user and the bot. Dialogs are usually triggered by some input from the user, and at the end of the dialog the control is returned to where it started, similar to a method in object oriented programming. To trigger a dialog with a hard coded keyword you can use this syntax:
intents.matches(/^version/i, function (session) {
session.send('Bot version 0.1');
});
This means that if a user types version in the chat window, a very short dialog will be triggered which only makes the bot reply with Bot version 0.1 to the users session.
To actually make use of LUIS we can listen for a named LUIS intent, in this case the intent Greet.
intents.matches('Greet', function (session, args) {
session.beginDialog('/greetUser', {entities:args.entities});
});
In this example the bot begins the /greetUser dialog and forwards the entities that LUIS found in the user utterance to that dialog.
If find it convenient to factor out dialogs to separate files. This keeps the index.js file small and isolates risks for accidentally disrupting dialogs that should remain untouched. To do this you could create a separate file in a subfolder called dialogs and define the dialog in index.js.
var di_greetUser = require('./dialogs/greetUser');
bot.dialog('/greetUser', di_greetUser.Dialog);
The file containing the actual dialog could look like the code below.
var builder = require("botbuilder");
var botbuilder_azure = require("botbuilder-azure");

module.exports = {
    Label: 'Greet user',
    Dialog: [
        function (session, args,  next) {
            var user = builder.EntityRecognizer.findEntity(args.entities, 'User');
            if (user) { // utterance contained a name, update name if necessary
                session.privateConversationData.username = user.entity;
            }
            session.send("Hallo %s, es freut mich dass Sie den USR III Chatbot nutzen.", session.privateConversationData.username);
            session.endDialog("Was möcten Sie im Zusammenhang mit der USR III wissen?");
        }
    ]
}
It sets the user name of the conversation based on the provided LUIS entity if it was provided with the utterance (“Hallo, ich bin Rikard”), otherwise makes use of the user name that the bot already has stored in the conversation data.
A more complex example is the one below:
module.exports = {
    Label: 'Ask Generic Yes No',
    Dialog: [
        function (session, args) {
            if (session.privateConversationData.usr3questions[session.privateConversationData.currentQuestionKey] !== '') {
                session.endDialog();
            } else {
                builder.Prompts.choice(session, args.prompt, "Ja|Nein", {listStyle: 3, retryPrompt: "I verstehe nicht. Bitte antworten 'ja' oder 'nein'."});
            }
        },
        function (session, results) {
            if (results.response) {
                session.privateConversationData.usr3questions[session.privateConversationData.currentQuestionKey] = results.response.entity == "Ja";
                session.endDialog();
            }
        }
    ]
}
The first part checks if the bot has already asked this question. If it has it will end the dialog prematurely to avoid asking for information that was already provided by the user. The second part asks a yes or no question, and the final part waits for a user response and stores this in the conversation data as a binary value. This example makes use of dictionaries to avoid copying the same code over and over, with the only difference in how the question is phrased and the variable where the answer is stored.
Dictionaries
Dictionaries are a great way to keep the code clean and to get input from contributors who do not have programming experience. In the example above about a generic yes/no question a dialog can be as simple as this:
module.exports = {
    someQuestion: "Do you understand this tutorial?",
    anotherQuestion: "I have chocolate, want some?"
}
Since it is using JSON syntax it can also contain arrays of synonyms, links to hero card images etc.
"Unternehmenssteuerreform III": {
        "synonyms": [
            "USR III",
            "Unternehmenssteuerreform III",
            "USR3"
        ],
        "longText": "Mit der USR III soll die ermässigte Besteuerung von Holding-, Domizil- und gemischten Gesellschaften abgeschafft werden. Diese steht nicht mehr im Einklang mit internationalen Standards. Um einen Wettbewerbsverlust der Schweiz zu verhindern, sollen international akzeptierte steuerliche Entlastungsmassnahmen eingeführt werden. Im Vordergrund steht dabei die Förderung von Innovationen. Auch wird der Bund die von den Kantonen beabsichtigten Gewinnsteuersenkungen mittragen.",
        "cards": [
            "USR III HL.jpg",
            "Zweck USR III HL.jpg"
        ]
},
Storing the data
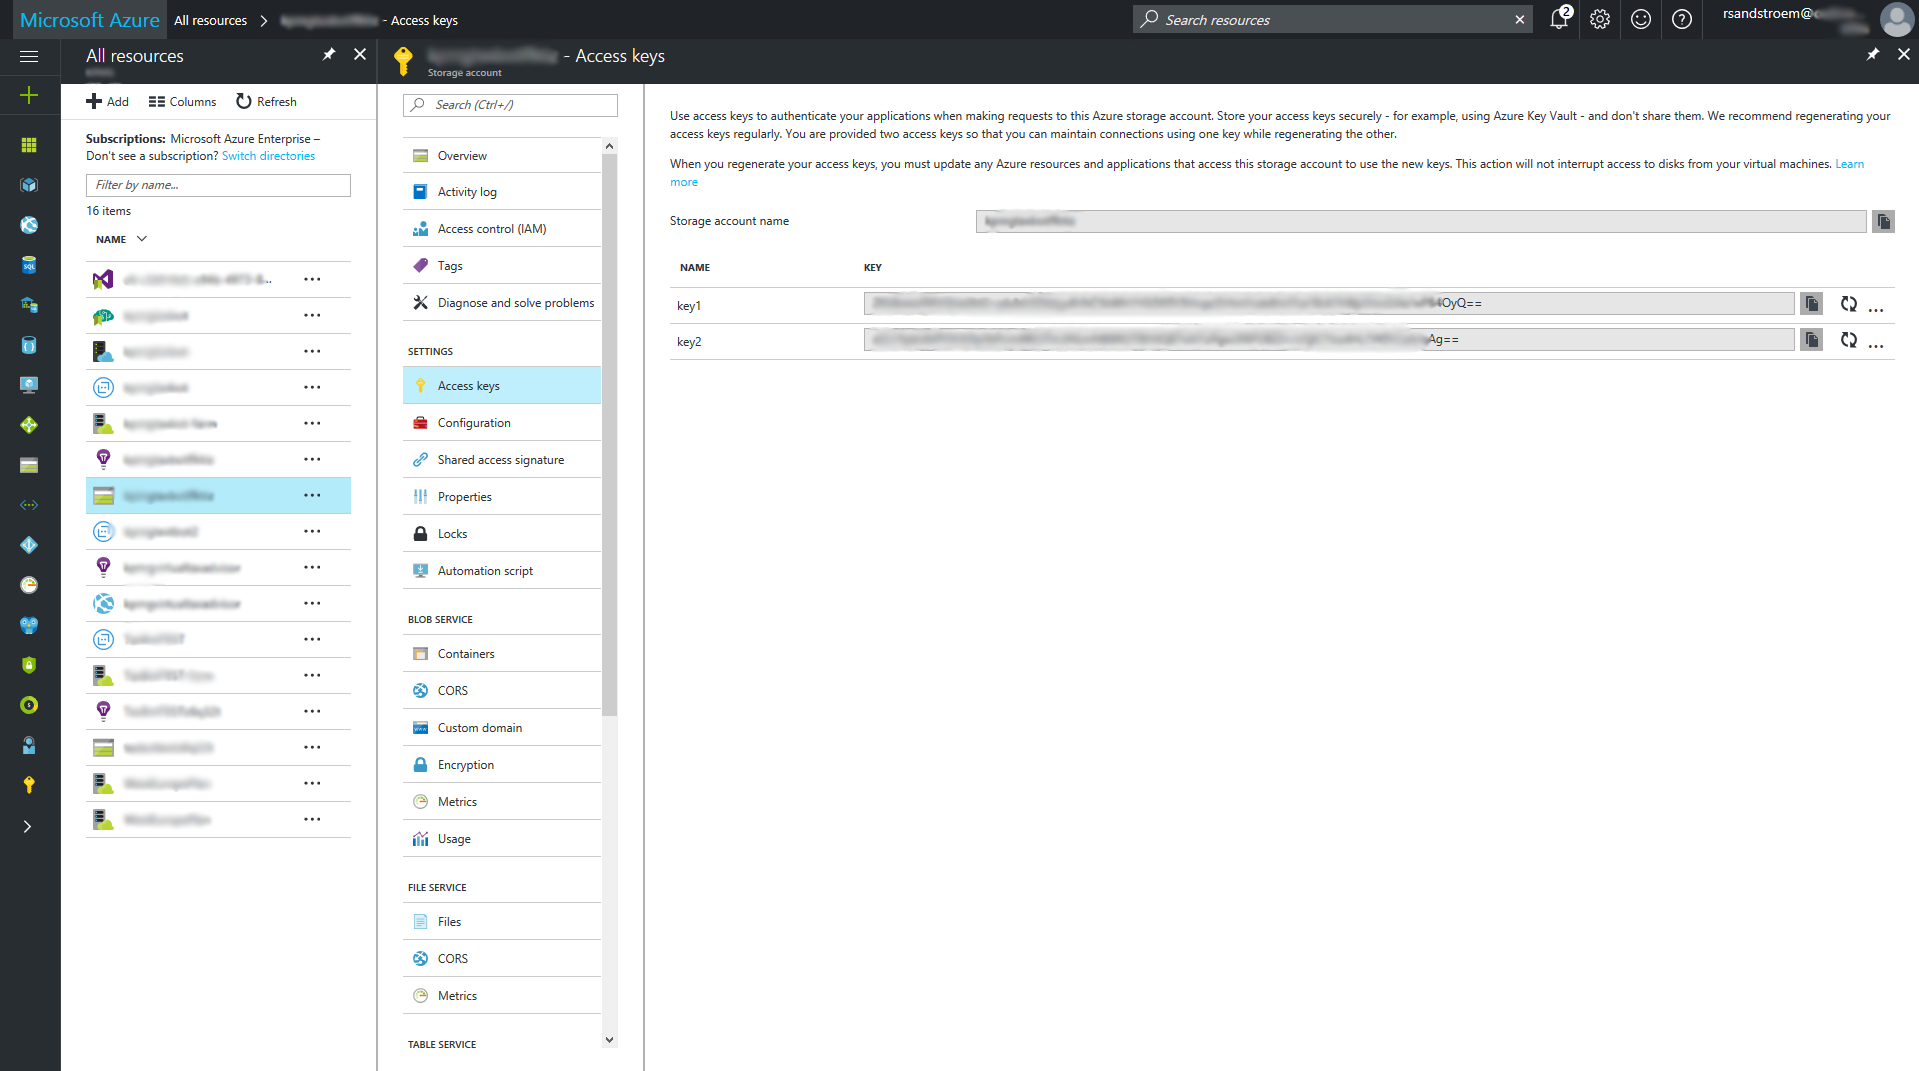
Asking a lot of information from the users should eventually lead to some action from our side. For this purpose we are storing the data in an Azure table.
First we add the storage account and key to the settings in the Azure portal, just like we already did for the LUIS authentication. The variables should be called AZURE_STORAGE_ACCOUNT and AZURE_STORAGE_ACCESS_KEY and their values can be copied from the corresponding storage account blade in the Azure portal.
To make the bot use the table storage you can add the following to the bot code.
// Connection to a remote Azure Table Storage
var tableName = 'MyBotStore';
var tableSvc = azure.createTableService();
tableSvc.createTableIfNotExists(tableName, function(error, result, response){
    if(!error){
        // Table exists or created
    }
});
var entGen = azure.TableUtilities.entityGenerator;
At some point you want to add the conversation data as a new row in the table, where each column contains some detail about the conversation, e.g., the user’s answer to the questions.
function(session){
    var row = {
        someQuestion: entGen.String(session.privateConversationData.someQuestion),
        anotherQuestion: entGen.String(session.privateConversationData.anotherQuestion),
    };
    tableSvc.insertEntity(tableName, row, function (error, result, response) {
        if(!error){
            // Entity inserted
            console.log("Successfully inserted contact details");
            console.log(row);
        } else {
            console.log("Could not insert contact details");
        }
    });
}
Testing and debugging
It is slow to develop the bot by editing some code, push the changes to the remote repository and wait for the bot service to update and restart with the new changes. It can also be quite hard to understand what is causing bugs if you do not employ any proper debugging functionality. Luckily Visual Studio Code does this quite simple. I prefer to start the bot from a terminal window with the debugging enabled.
node --debug-brk=5858 --nolazy index.js
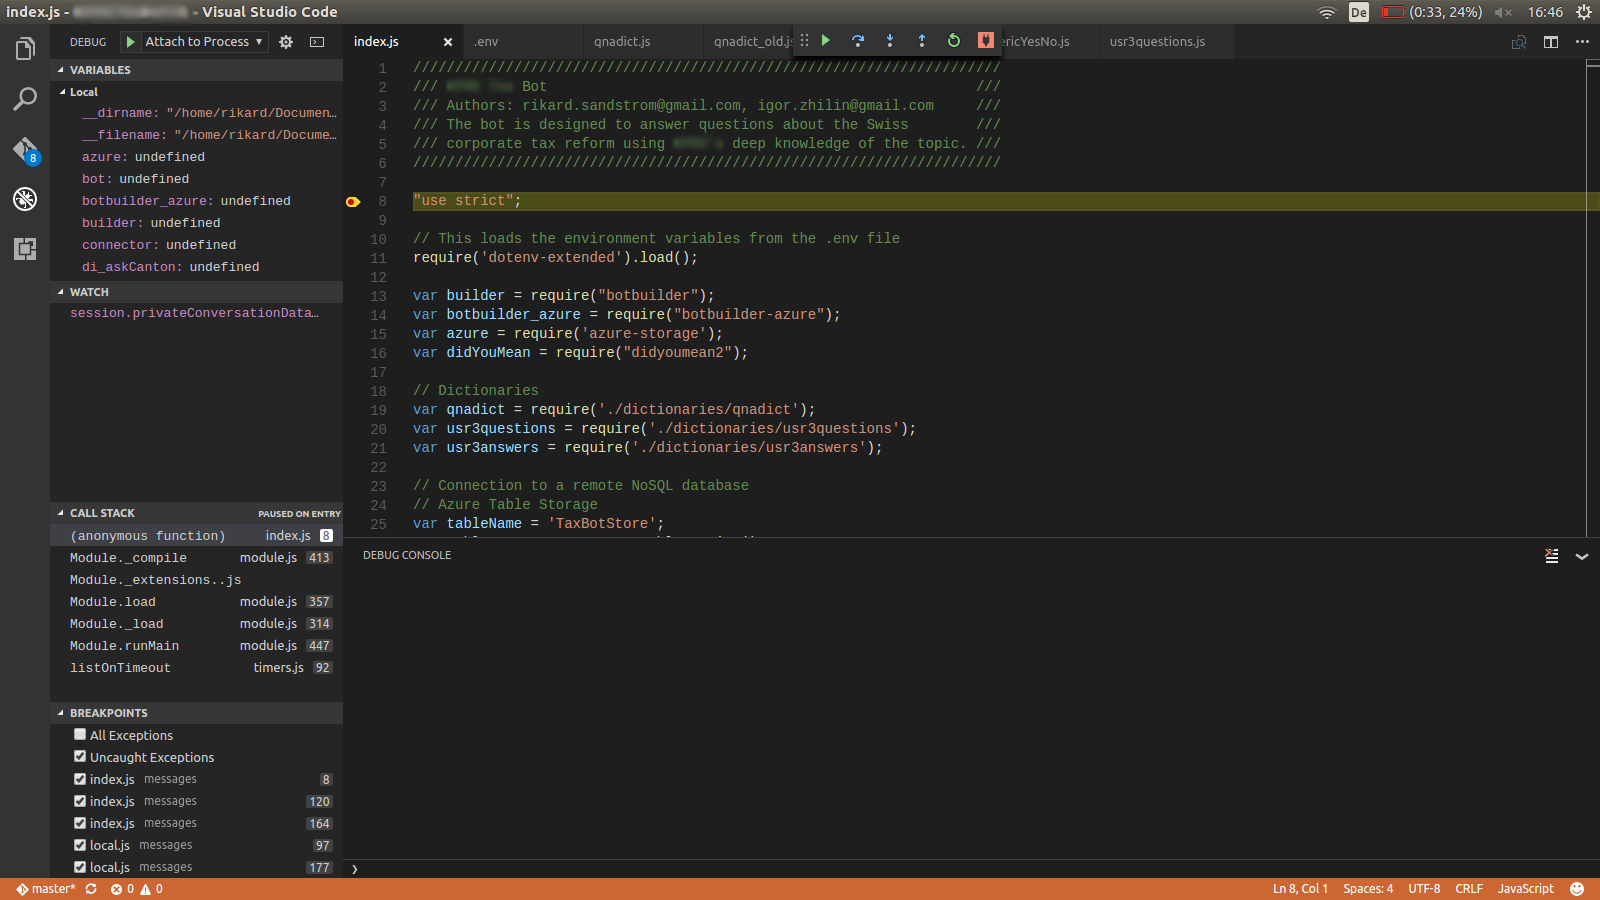
Next attach the debugger of the IDE to the process. Add some breakpoints, watched expressions etc, and you should find the source of the bug in no time. To test the bot you can either use the terminal window directly if you use the ConsoleConnector, or you could use the Bot Framework Emulator if you want a user experience closer to reality. A third way to test the bot locally is to set up a web connector to the bot from a local html file and host it on your own computer, for example with:
python –m SimpleHTTPServer 8000
What is next?
In this post we used the Microsoft Bot Framework to pull the pieces together which we set up in the first post in this mini-series. By writing some node.js code we started capturing user intents and triggered actions through dialogs. We also save the important conversation data to an external storage and made a small introduction into how to find out what is wrong if the bot does not behave as intended.
The last part is hosting the bot and making it accessible to your users. This will be covered in the third and last blog post in this series.
Comments !