
My business case involved running GPU accelerated deep learning jobs on a set of local desktops, and was looking for installation instructions to provide the administrators. Since nearly all installation instructions assume that the operating system is Linux, I decided to write my own instructions for Windows, which I share with you. I hope you find these instructions useful.
Introduction
The computers at my workplace are all running some version of Microsoft Windows. While that makes perfect sense in a Business Intelligence context, it unusual for a Data Science setup.
My business case involved running GPU accelerated deep learning jobs on a set of local desktops, and was looking for installation instructions to provide the administrators. Since nearly all installation instructions assume that the operating system is Linux, I decided to write my own instructions for Windows, which I share with you.
The tool stack is based on two popular open source deep learning libraries which we will access through a python API.
The instructions were tested on a Dell XPS 15, equipped with a NVidia GTX 1050, running Windows 10, while the production machines are equipped with much more powerful hardware from the same generation. I hope you find these instructions useful, please leave comments and questions below the article.
Anaconda
The foundation for machine learning in python consists of commonly used packages such as numpy and scipy. Luckily Anaconda from Continuum contains most of what we need. While Anaconda does not itself contain any deep learning libraries, it bundles scikit-learn, which is a great resource for traditional machine learning in python.
There are python 2.x and 3.x versions of Anaconda, as well as 32-bit and 64-bit versions. Due to that Tensorflow only supports python 3.5 on Windows we want to install 64-bit version of Anaconda for python 3.x.
CUDA Toolkit
To run the deep learning on GPU we need some CUDA libraries and tools. Follow the instructions to install CUDA Toolkit on Windows.
We need CUDA Toolkit v8.0. Select the correct version of Windows and download the installer.
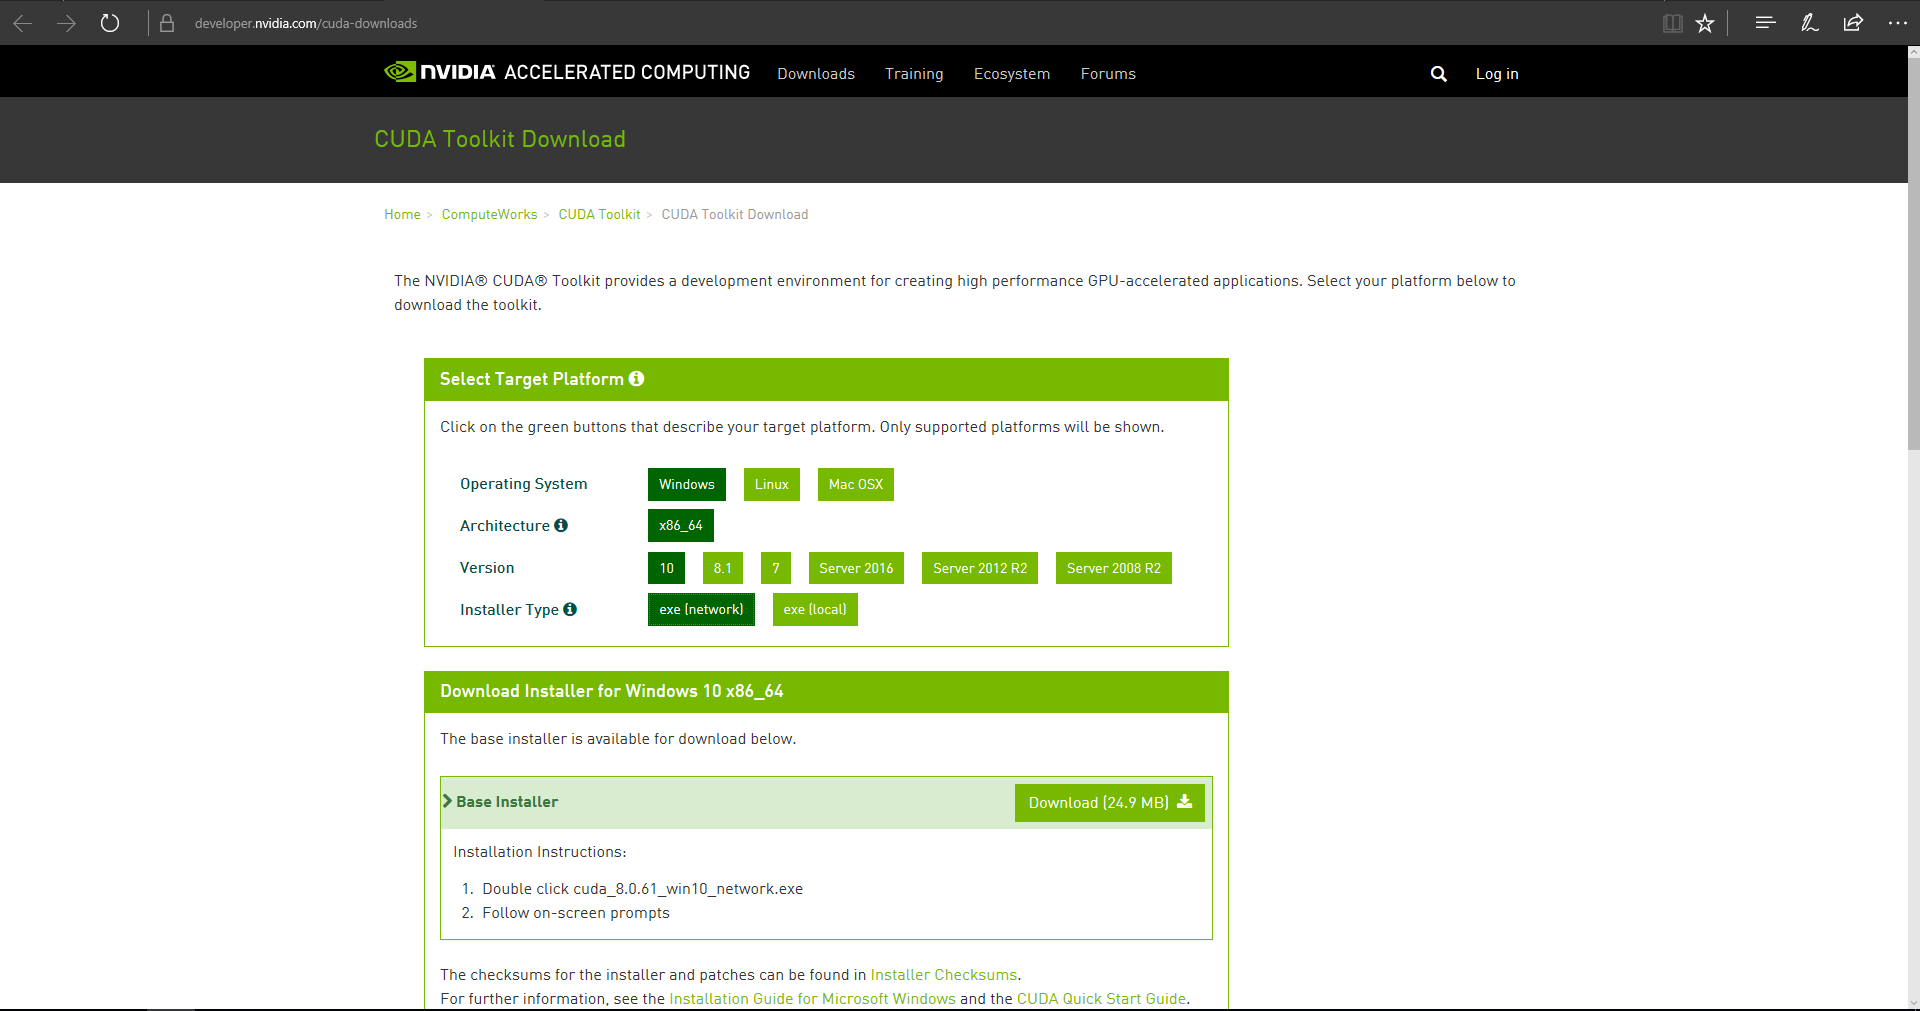
By default the toolkit will be installed in C:\Program Files\NVIDIA GPU Computing Toolkit\CUDA\v8.0.
Once installed, add the installation folder to the system %PATH% variable.
cuDNN
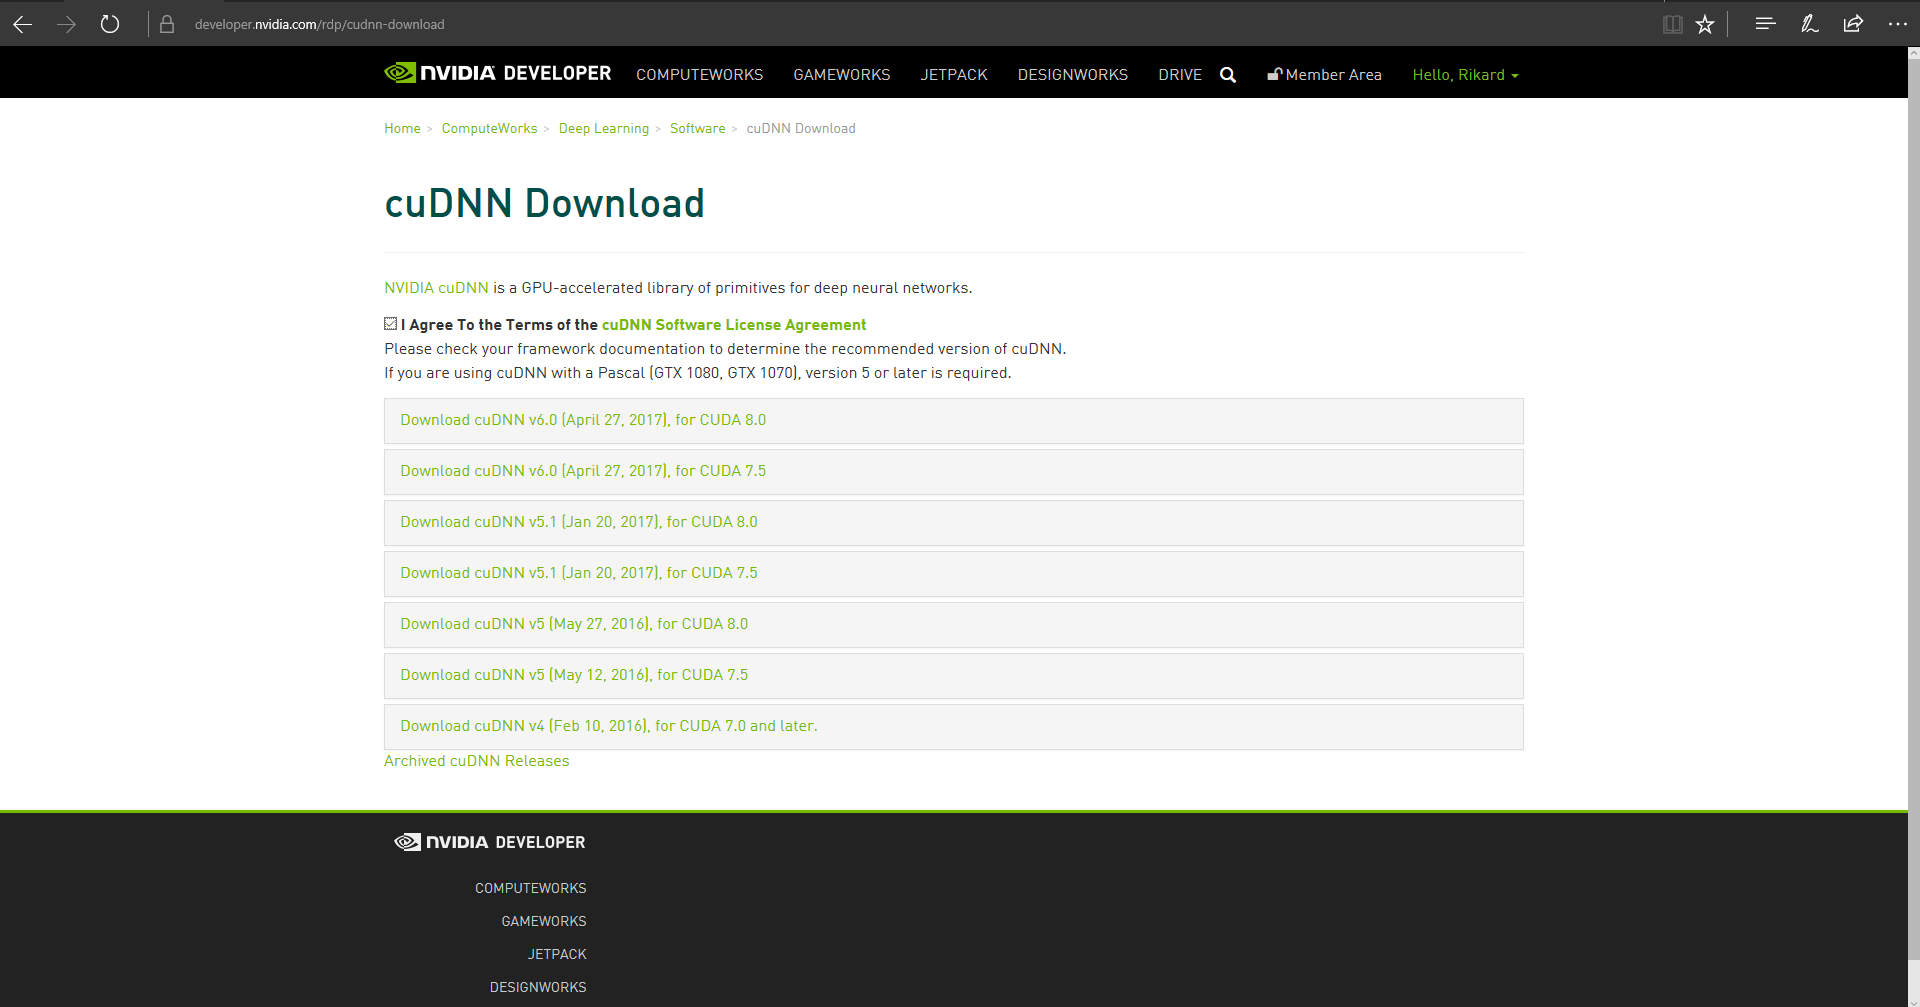
Next we need the NVIDIA CUDA® Deep Neural Network library cuDNN.
To access it you need to create an account, if you do not have one already, and log in with your NVidia Developer credentials.
We need cuDNN 5.1 for the CUDA Toolkit version we just installed earlier, i.e., 8.0.
 Once downloaded, simply copy the files to folder where you installed the CUDA Toolkit. If you followed these instructions you should already have the system
 %PATH% pointing to this folder so you are good to go.
Reboot the machine before going to the next steps.
Tensorflow
Finally we are ready to install Google's deep learning framework, Tensorflow. Since we are going to use GPU accelerated learning follow the GPU specific instructions. Before you get started, however, I found this method the easiest to obtain reliable installation results:
conda create --name deeplearning python=3.5
activate deeplearning(deeplearning)C:> pip install --ignore-installed --upgrade https://storage.googleapis.com/tensorflow/windows/gpu/tensorflow_gpu-1.1.0-cp35-cp35m-win_amd64.whl
This will set up our existing Anaconda installation to use python 3.5 and install tensorflow into this new environment. The environment "deeplearning" can of course be called anything else, just remember your choice since you will need to activate this environment every time that you want to use Tensorflow.
To test if the installation was successful open a python prompt or jupyter notebook and run a hello world script:
import tensorflow as tf
hello = tf.constant('Hello Tensorflow!')
sess = tf.Session()
sess.run(hello)
Theano
While we are at it, lets also install the Theano deep learning framework. Please read the instructions for Theano installation on Windows.
Set up an environment with conda just like we did for Tensorflow. I recommend to avoid reusing the same environment that we set up for Tensorflow, since they currently require conflicting versions of SciPy.
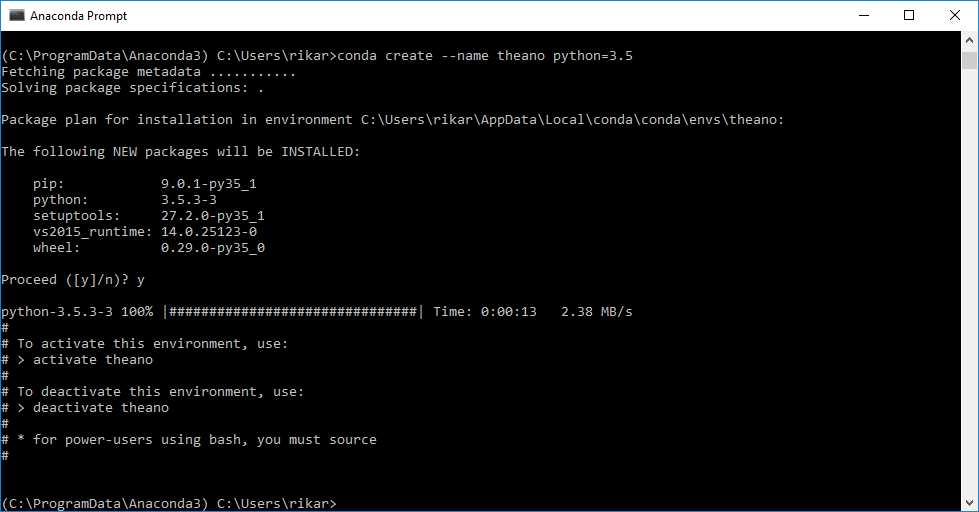
conda create --name theano python=3.5
activate theano
Next we need to get some classical linux compilers like gcc, so start with the following command from within the environment (activate theano).
conda install m2w64-toolchain
Theano can run without this, but you will pay a performance penalty and get this angry warning every time you import theano:
>>> import theano
WARNING (theano.configdefaults): g++ not available, if using conda: `conda install m2w64-toolchain`
WARNING (theano.configdefaults): g++ not detected ! Theano will be unable to execute optimized C-implementations (for both CPU and GPU) and will default to Python implementations. Performance will be severely degraded. To remove this warning, set Theano flags cxx to an empty string.
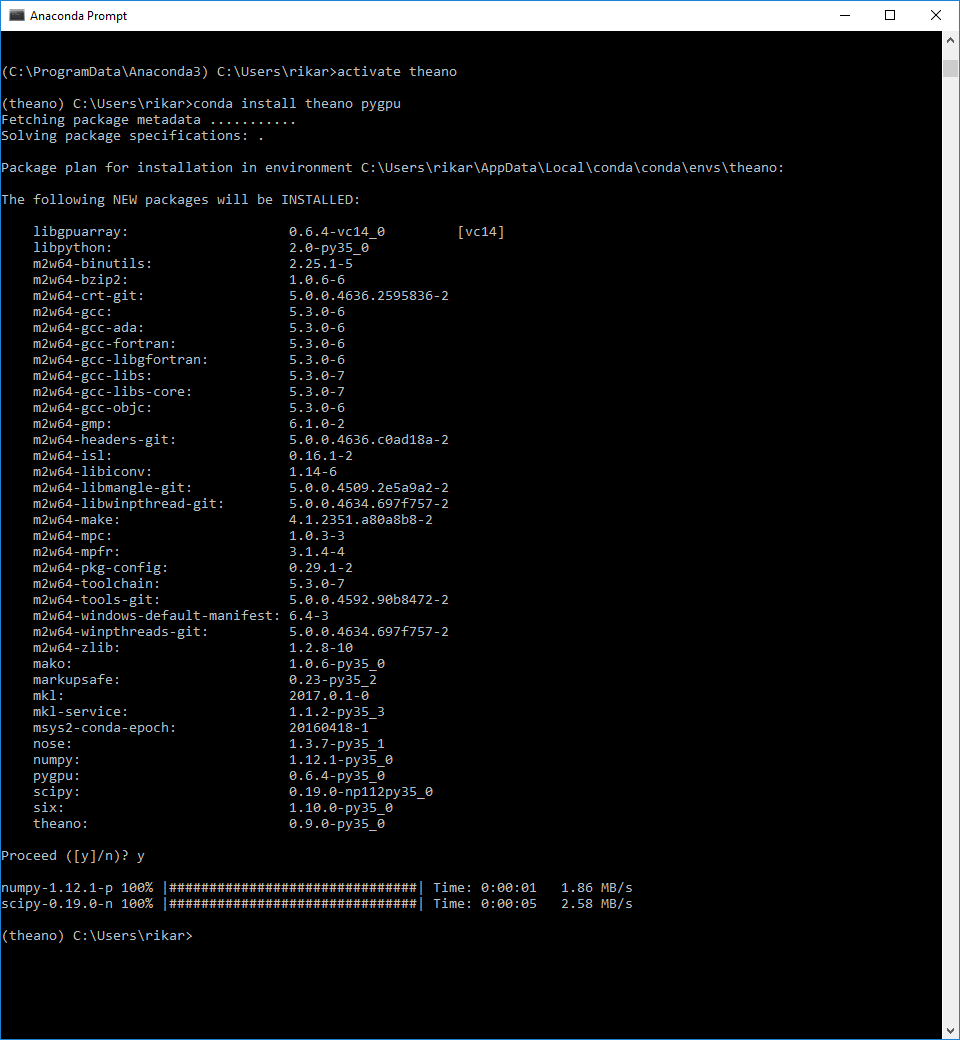
Once the compilers are installed, go ahead and install theano using conda:
conda install theano pygpu
Now run a little python program to see if the installation is OK:
import theano.tensor as T
from theano import function
x = T.dscalar('x')
y = T.dscalar('y')
z = x + y
f = function([x, y], z)
f(2, 3)
array(5.0)
Keras
Finally install Keras, which provides a convenient interface to both Tensorflow and Theano.
pip install keras
To switch between Tensorflow and Theano follow the instructions.
Keras will inform you which backend it is using when you import it in python:
>>> import keras
Using TensorFlow backend.
What is next?
This blog post gave end-to-end instructions on setting up a Windows machine for GPU-accelerated deep learning with python. In a later article I will show how to take advantage of this setup to solve some real world problems.
If you do not yet have the hardware for running deep learning on a GPU, I warmly recommend reading Tim Dettmer's blog on that topic before going shopping.
Comments !